# Kafka/Redis + ELFK分布式日志收集


# 使用背景
由于
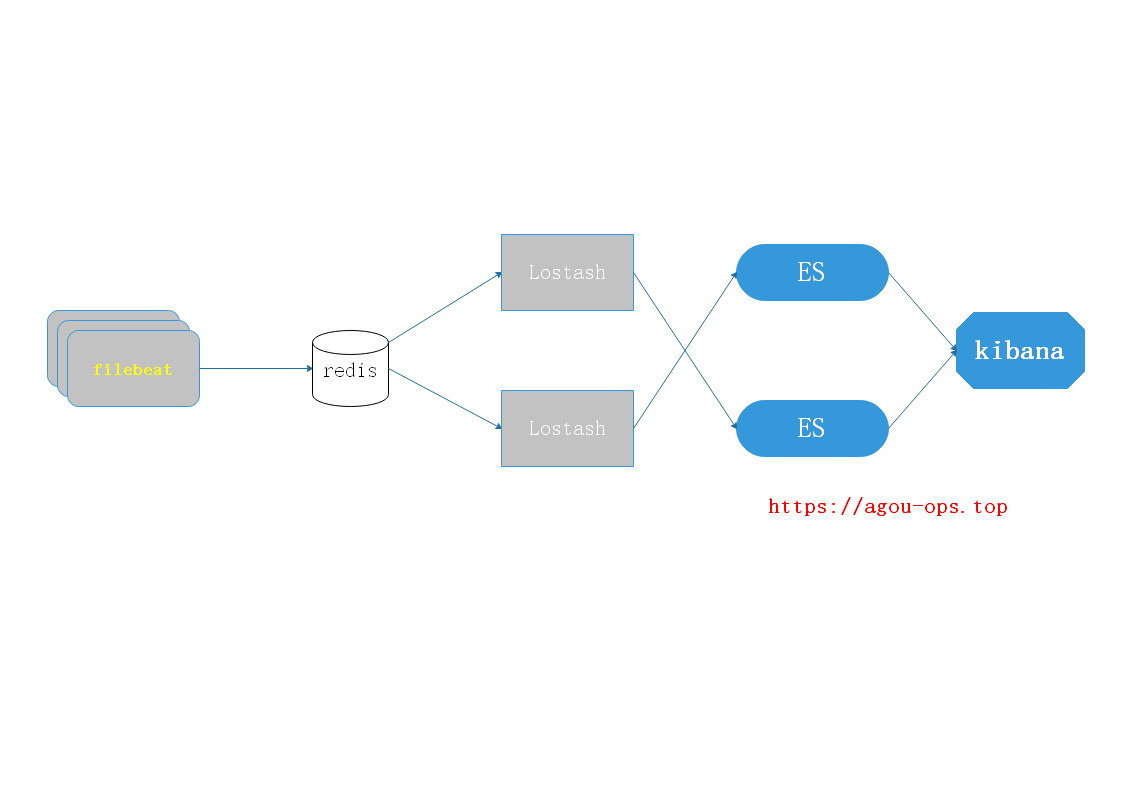
ELFK的局限性,随着Beats收集的每秒数据量越来越大,Logstash可能无法承载这么大量日志的处理。虽然说,可以增加 Logstash 节点数量,提高每秒数据的处理速度,但是仍需考虑可能Elasticsearch无法承载这么大量的日志的写入。此时,我们可以考虑 引入消息队列 (Kafka),进行缓存。
# Filebeat --> Kafka/Redis
# vim /usr/local/filebeat-7.7.1-linux-x86_64/filebeat.yml
filebeat.inputs:
- type: log
  paths:
    - /usr/local/apache-tomcat-9.0.34/logs/tomcat_access_log.*.log
  #fields:
  #  log_source: messages
  #fields_under_root: true

output.kafka:
  hosts: ["192.168.0.108:9092"]
  topic: tomcat
  partition.round_robin:
    reachable_only: false
1
2
3
4
5
6
7
8
9
10
11
12
13
14
2
3
4
5
6
7
8
9
10
11
12
13
14
输出到redis:
# filebeat.inputs 内容和上面类似...
# 简单输出示例
output.redis:
  hosts: ["localhost"]		# 如果是集群, 则需要添加多个
  # port: 6379
  password: "my_password"
  key: "filebeat"
  db: 0
  timeout: 5

# output.redis:
#   hosts: ["localhost"]
#   key: "default_list"
#   keys:
#     - key: "info_list"   # send to info_list if `message` field contains INFO
#       when.contains:
#         message: "INFO"
#     - key: "debug_list"  # send to debug_list if `message` field contains DEBUG
#       when.contains:
#         message: "DEBUG"
#     - key: "%{[fields.list]}"
#       mappings:
#         http: "frontend_list"
#         nginx: "frontend_list"
#          mysql: "backend_list"
1
2
3
4
5
6
7
8
9
10
11
12
13
14
15
16
17
18
19
20
21
22
23
24
25
2
3
4
5
6
7
8
9
10
11
12
13
14
15
16
17
18
19
20
21
22
23
24
25
# 启动 Kafka/Redis
这里为了方便起见,我使用docker-compose脚本来进行快速部署,脚本内容参见[使用 docker-compose 部署 Kafka](../Kafka/使用 docker-compose 部署 Kafka.md)
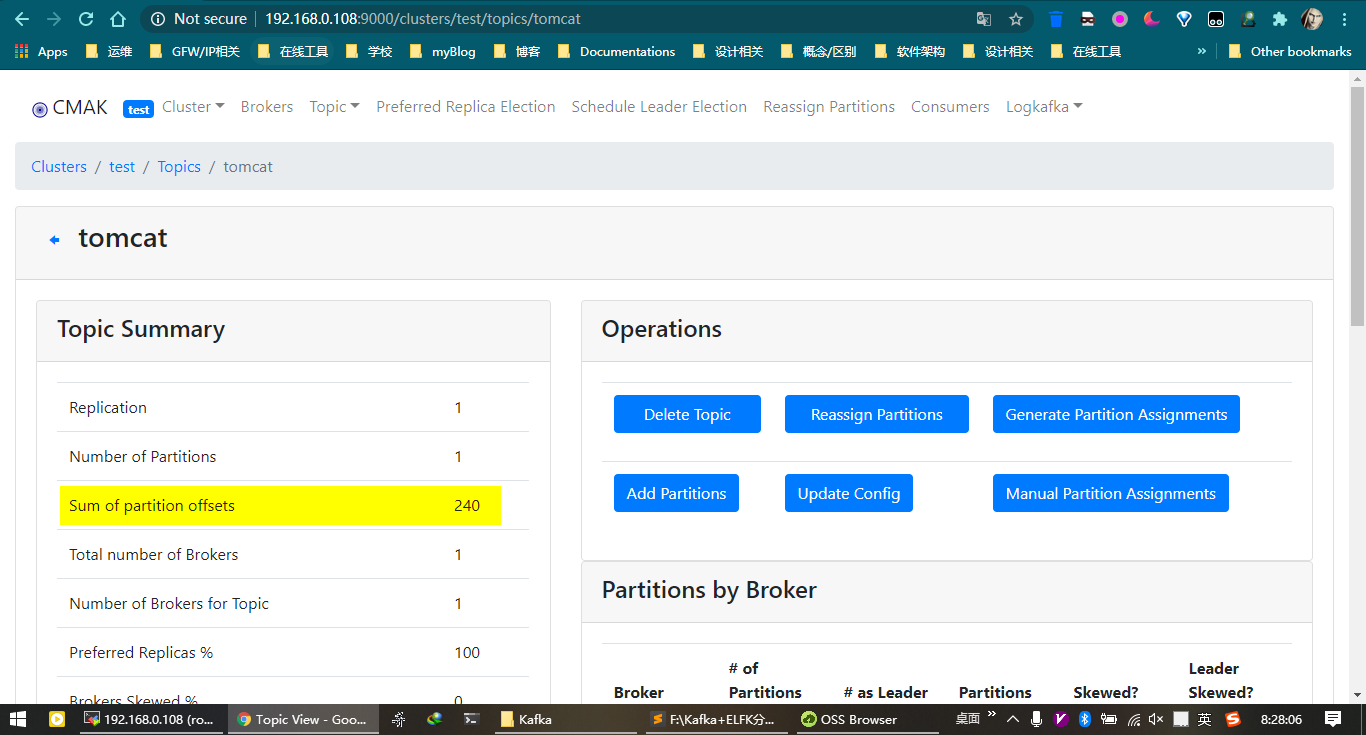
如果你已经安装好了kafka-manager, 可以在面板上看到相关topic已经创建, 并且写入数据之后, 已经有了分区偏移量, 如下图所示:

检测
filebeat是否将日志传递给kafka:bin/kafka-console-consumer.sh --zookeeper 192.168.0.108:2181 --topic tomcat --from-beginning1
启动redis:
systemctl start redis
1
进入redis交互式客户端进行查看(由于信息太长, 在此进行缩略显示):
127.0.0.1:6379> keys *
1) "filebeat"
127.0.0.1:6379> LPOP filebeat
"{\"@timestamp\":\"2020-07-15T14:52:07.315Z\",\"@metadata\":
...
`"GET / HTTP/1.1`\\\",\\\"status\\\":\\\"200\\\",\\\"SendBytes\\\":\\\"11216\\\",\\\"Query?string\\\":\\\"\\\",\\\"partner\\\":\\\"-\\\",\\\"AgentVersion\\\":\\\"curl/7.29.0\\\"}\",\"input\":{\"type\":\"log\"},\"host\":
...
127.0.0.1:6379> LPOP filebeat
"{\"@timestamp\":\"2020-07-15T14:52:08.339Z\",\"@metadata\":{\"beat\":\"filebeat\",\"type\":\"_doc\",\"version\":\"7.7.1\"},\"agent\":
...
`"GET/test/index.html`HTTP/1.1\\\",\\\"status\\\":\\\"200\\\",\\\"SendBytes\\\":\\\"19\\\",\\\"Query?string\\\":\\\"\\\",\\\"partner\\\":\\\"-\\\",\\\"AgentVersion\\\":\\\"curl/7.29.0\\\"}\",\"log\":{\"offset\":234,\"file\":{\"path\":\``"/usr/local/apache-tomcat-9.0.34/logs/tomcat_access_log.2020-07-15.log`
...
1
2
3
4
5
6
7
8
9
10
11
12
13
2
3
4
5
6
7
8
9
10
11
12
13
# Kafka/Redis --> Logstash --> ElasticSearch
从kafka输入:
# vim /usr/local/logstash-7.7.1/config/kafka2es.conf
input {
    kafka {
    codec => "json"
    topics => ["tomcat"]
    bootstrap_servers => "192.168.0.108:9092"
    auto_offset_reset => "latest"
    group_id => "logstash-g1"
    }
}
output {
    elasticsearch {
    hosts => "http://192.168.0.108:9200"
    index => "tomcat-%{+YYYY.MM.dd}"
	}
}
1
2
3
4
5
6
7
8
9
10
11
12
13
14
15
16
2
3
4
5
6
7
8
9
10
11
12
13
14
15
16
从redis输入:
input {
  redis {
    host => "localhost"
    port => "6379"
    db => "0"
    key => "filebeat"
    data_type => "list"
    password => ""
    codec  => "json"
 	}
}

# output 内容与 kafka 相似.;.
1
2
3
4
5
6
7
8
9
10
11
12
13
2
3
4
5
6
7
8
9
10
11
12
13
启动es和logstash之后, 打开浏览器, 使用插件访问elasticsearch的web管理页面, 查看是否已经收集到tomcat日志信息.

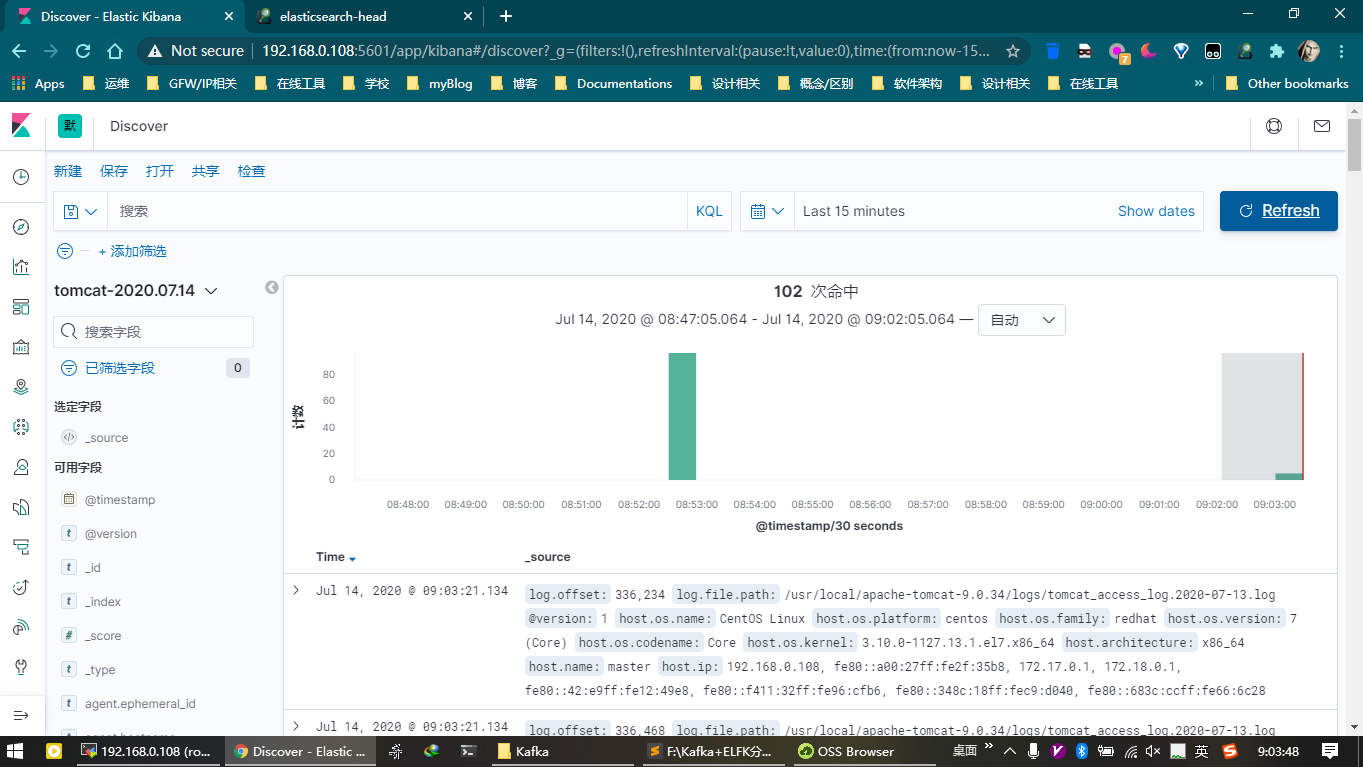
打开Kibana管理界面, 添加索引, 并在Dashboard中查看来自Logstash的日志.

# 参考链接
- configuring output: https://www.elastic.co/guide/en/beats/filebeat/current/configuring-output.html
- https://www.cnblogs.com/sanduzxcvbnm/p/11422928.html