Appearance
Tomcat Cluster(nginx)
Tomcat + Nginx 集群搭建
由于手头资源有限,将集群部署到同一主机之上,以不同端口来代替不同 Tomcat 主机.
| Role | IP |
|---|---|
| Nginx(LB) | 172.16.1.128:80 |
| Tomcat-1 | 172.16.1.128:8080 |
| Tomcat-2 | 172.16.1.128:8888 |
部署 Tomcat
安装和配置 Tomcat 环境,参考[Tomcat 基础](./Tomcat 基础.md)
在/usr目录下,复制一份 Tomcat,并将其命名为tomcat9-test作为测试使用。
[root@stor1 tomcat]\# cp -ar tomcat9/ tomcat9-test
[root@stor1 tomcat]\# ls
tomcat9  tomcat-test
[root@stor1 tomcat]\# cp -ar tomcat9/ tomcat9-test
[root@stor1 tomcat]\# ls
tomcat9  tomcat-test
为Tomcat-1和Tomcat-2分别创建测试 WEB 站点:
[root@stor1 tomcat]\#  mkdir -p /web1/webapp
[root@stor1 tomcat]\#  mkdir -p /web2/webapp
[root@stor1 tomcat]\#  mkdir -p /web1/webapp
[root@stor1 tomcat]\#  mkdir -p /web2/webapp
[root@stor1 tomcat]\# vim /web1/webapp/index.jsp
<%@ page language="java" import="java.util.*" pageEncoding="UTF-8"%>
<html>
 <head>
    <title>JSP test1 page</title>
 </head>
 <body>
    <% out.println("Welcome tomcat1 Web Page");%>
 </body>
</html>
[root@stor1 tomcat]\# vim /web2/webapp/index.jsp
<%@ page language="java" import="java.util.*" pageEncoding="UTF-8"%>
<html>
 <head>
    <title>JSP test2 page</title>
 </head>
 <body>
    <% out.println("Welcome tomcat2 Web Page");%>
 </body>
</html>
编辑服务配置文件conf/server.xml,在152行左右,<Host>后面增加以下内容:
              <Context docBase="/web1/webapp" path="" reloadable="false">
              </Context>
              <Context docBase="/web1/webapp" path="" reloadable="false">
              </Context>
然后,启动Tomcat-1服务即可,bash bin/startup.sh
修改Tomcat-2的Server和Connector端口,避免与Tomcat-1冲突,并修改其默认主页):
<!-- 编辑 conf/server.xml 文件 -->
...
<Server port="8006" shutdown="SHUTDOWN">
...
    <Connector port="8888" protocol="HTTP/1.1"
...
			  <Context docBase="/web2/webapp" path="" reloadable="false">
              </Context>
<!-- 编辑 conf/server.xml 文件 -->
...
<Server port="8006" shutdown="SHUTDOWN">
...
    <Connector port="8888" protocol="HTTP/1.1"
...
			  <Context docBase="/web2/webapp" path="" reloadable="false">
              </Context>

启动Tomcat-2服务,bash bin/startup.sh
查看端口监听情况:
[root@stor1 tomcat-test]\# ss -tnulp
Netid State      Recv-Q Send-Q                  Local Address:Port                                 Peer Address:Port
udp   UNCONN     0      0                                   *:68                                              *:*                   users:(("dhclient",pid=791,fd=6))
tcp   LISTEN     0      128                                 *:22                                              *:*                   users:(("sshd",pid=977,fd=3))
tcp   LISTEN     0      100                         127.0.0.1:25                                              *:*                   users:(("master",pid=1167,fd=13))
tcp   LISTEN     0      128                              [::]:22                                           [::]:*                   users:(("sshd",pid=977,fd=4))
tcp   LISTEN     0      100                              [::]:8888                                         [::]:*                   users:(("java",pid=4805,fd=55))
tcp   LISTEN     0      100                             [::1]:25                                           [::]:*                   users:(("master",pid=1167,fd=14))
tcp   LISTEN     0      1                  [::ffff:127.0.0.1]:8005                                         [::]:*                   users:(("java",pid=4262,fd=67))
tcp   LISTEN     0      1                  [::ffff:127.0.0.1]:8006                                         [::]:*                   users:(("java",pid=4805,fd=67))
tcp   LISTEN     0      100                              [::]:8080                                         [::]:*                   users:(("java",pid=4262,fd=55))
可以看到8888、8080、8005和8006已经处于监听状态。
配置 Nginx
这里直接模拟测试动静分离的过程。
直接编辑 nginx 的主配置文件/etc/nginx/nginx.conf:
# 在 http 配置段中添加添加以下内容
    upstream tomcat-server {
        server 127.0.0.1:8080 weight=1;
        server 127.0.0.1:8888 weight=1;
        server 127.0.0.1:8005 weight=1;
        server 127.0.0.1:8006 weight=1;
    }

    # 并直接修改原来的 server 段内容
    server {
            listen       80;
            server_name  localhost;
            root         /usr/share/nginx/html;

            location ~* \.(gif|jpg|jpeg|png|bmp|swf|css)$ {
                root /usr/share/nginx/html/imgs;
                expires 30d;
            }

            location ~* \.jsp$ {
                proxy_pass http://tomcat-server;
                proxy_set_header Host $host;
            }

            location / {
                index  index.html index.htm;
                # proxy_pass http://tomcat-server;
            }
    }
最后启动 nginx 服务即可,systemctl restart nginx
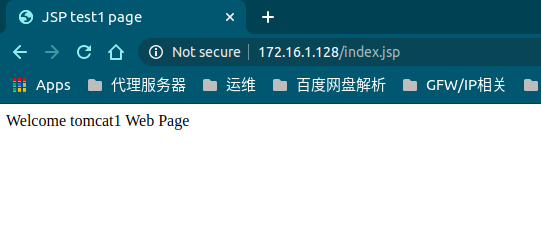
打开浏览器查看:


 VitePress